skip to main |
skip to sidebar
Posts have been light this week because we are in full End of School mode! A had a teddy bear picnic at the park with his class today and tomorrow is a field day his last official day of school! I'm equal parts excited and nervous about having both boys home all day, everyday! Of course we'll do the summer classes, sports camps and swimming, etc. but I'm sure we'll still have to come up with A LOT of fun crafts to keep these little guys entertained. And like always, we'll be sure to share them all with you!
Little O and I have also been enjoying our last few days together one on one with ice cream dates here and park excursions there. He'll be headed off to preschool next year (again, equal parts relieved and sad my little guy is growing up).
We also have our first official family reunion this weekend. And so it begins. WooHoo for summer!
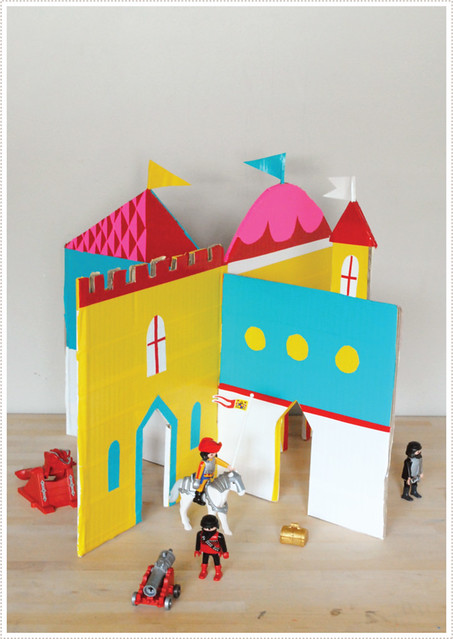
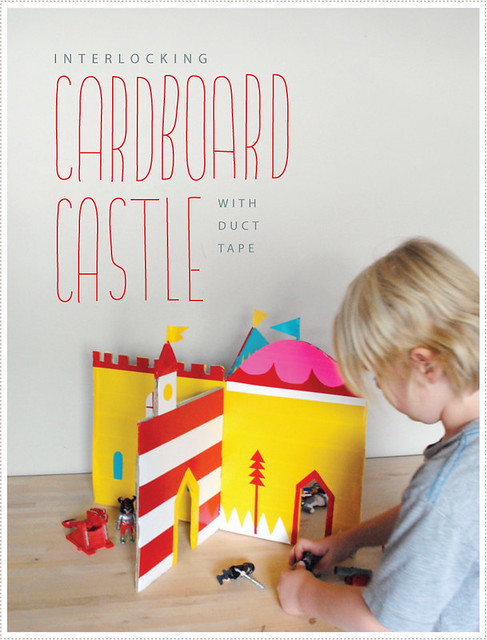 OK friends, I've finally got everything together to share with you our latest cardboard + duct tape creative adventure (which is the perfect weekend project for you and your Littles). Presenting...our Interlocking Cardboard Play Castle! We are having SO much fun with this, you wouldn't even believe it. In fact I think I've found just thing to get me more engaged and on the floor playing with my Littles in their world. I'm not usually one to sit down and "play" with my kids. I typically help to facilitate their play and then let them go at it. But with this castle...well I've been down on my hands and knees playing castle right alongside them (and I forgot how fun delving into accents can be..). OK friends, I've finally got everything together to share with you our latest cardboard + duct tape creative adventure (which is the perfect weekend project for you and your Littles). Presenting...our Interlocking Cardboard Play Castle! We are having SO much fun with this, you wouldn't even believe it. In fact I think I've found just thing to get me more engaged and on the floor playing with my Littles in their world. I'm not usually one to sit down and "play" with my kids. I typically help to facilitate their play and then let them go at it. But with this castle...well I've been down on my hands and knees playing castle right alongside them (and I forgot how fun delving into accents can be..).
 Well I have to confess, I got a little obsessed with this one. It was SO much fun to make.
Once I finally figured out how to cut and handle duct tape, well I couldn't wait to try my hand at something a little more involved. Well I have to confess, I got a little obsessed with this one. It was SO much fun to make.
Once I finally figured out how to cut and handle duct tape, well I couldn't wait to try my hand at something a little more involved.
To begin, I used sturdy cardboard (taken from an old Baby Lock sewing machine box) to cut out the basic interlocking shapes of my castle. I decided to go with a 10"x10" squares for each portion of each wall (so a 20" long sheet of board all together) and then added a mix of castle-like rooftop structures up top.
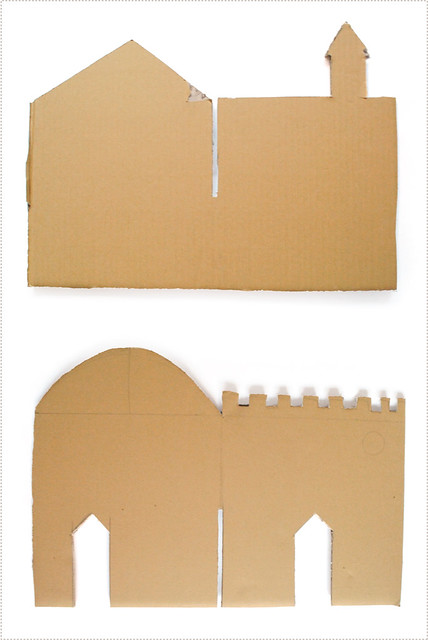 I then cut out door frames from each wall, making sure they were large enough for the Littles play things (namely Playmobil characters) to fit in and out of. I then cut out door frames from each wall, making sure they were large enough for the Littles play things (namely Playmobil characters) to fit in and out of.
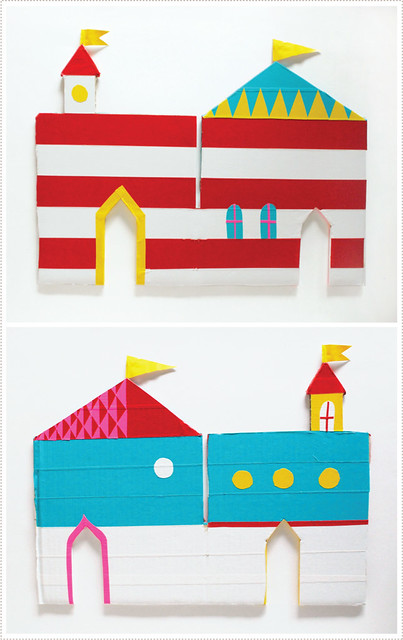
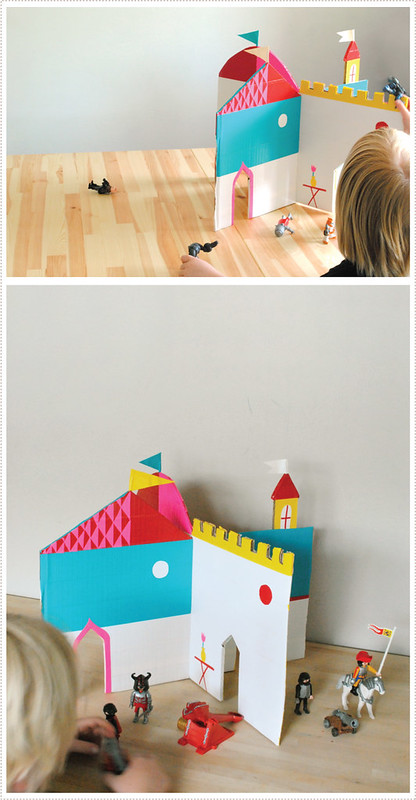
And now comes the fun part...decorating the castle walls with brightly colored duct tape! (I should get them to sponsor these posts, don't you think? I mean I'm only singing their praises like, every other minute...:)) The only hard part in decorating the castle was deciding on what to leave out, as there are so many directions you could take this.
 In the end I decided to keep it fun and graphic and not too specific as
to what you would do in what room (but you could always go more literal by having more
obvious interior and exterior rooms, etc. for yours if you like). In the end I decided to keep it fun and graphic and not too specific as
to what you would do in what room (but you could always go more literal by having more
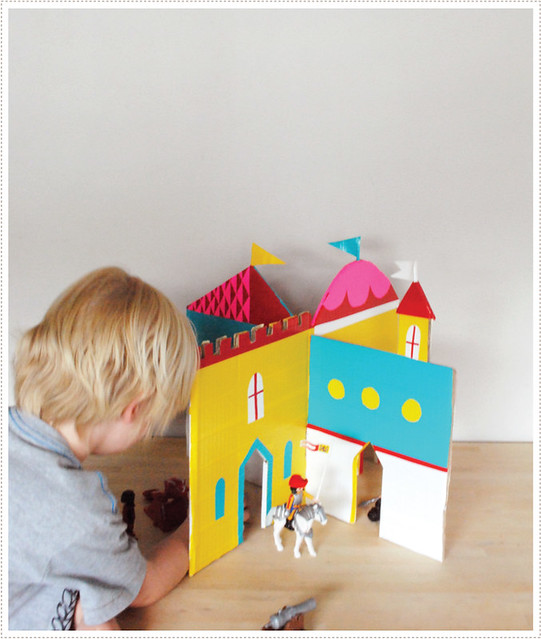
obvious interior and exterior rooms, etc. for yours if you like). 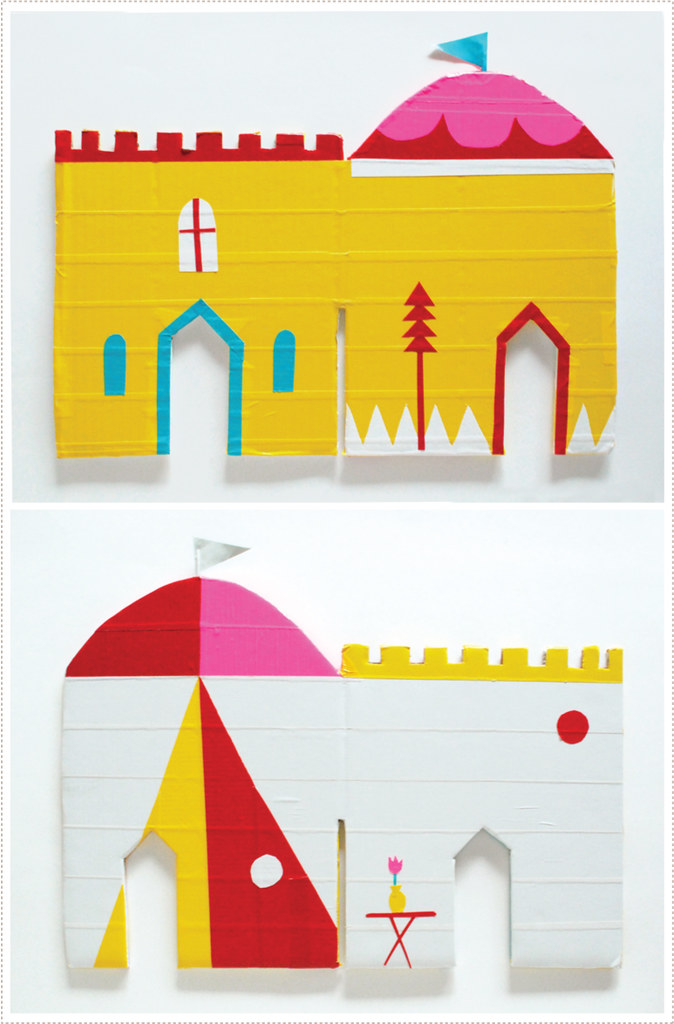 I did add a few small elements to some "rooms" such as a tree to suggest the outdoors and small table with a tulip for an indoor room (hey, even strong warriors need a calm place of respite after a long journey or a fierce battle, right?). I also added flags to some of the rooftops by simply wrapping duct tape around a tooth pick and then cutting it down to the desired shape. From there I just pushed the tooth pick into the top of the cardboard (I might however decide to hot glue them in later for greater permanence). I did add a few small elements to some "rooms" such as a tree to suggest the outdoors and small table with a tulip for an indoor room (hey, even strong warriors need a calm place of respite after a long journey or a fierce battle, right?). I also added flags to some of the rooftops by simply wrapping duct tape around a tooth pick and then cutting it down to the desired shape. From there I just pushed the tooth pick into the top of the cardboard (I might however decide to hot glue them in later for greater permanence).
If you want to have your Littles help with this process, adding the
details/decals is a great way to do it. Just be sure that you are doing the cutting and then you can hand the decal over to them and have them
place it on (and depending on their age you might want to help them with this. A would get really frustrated whenever an item folded over onto itself and he couldn't take it apart). You can also bring them in on the design process. They'll love letting you know just what they have in mind for their castle.
And if you are interested in creating an interlocking castle yourself, and want to follow the basic shape of mine, I have created some templates for you to use. Just print them out and use them as patterns to trace onto your thick cardboard (or foam core works really well too).
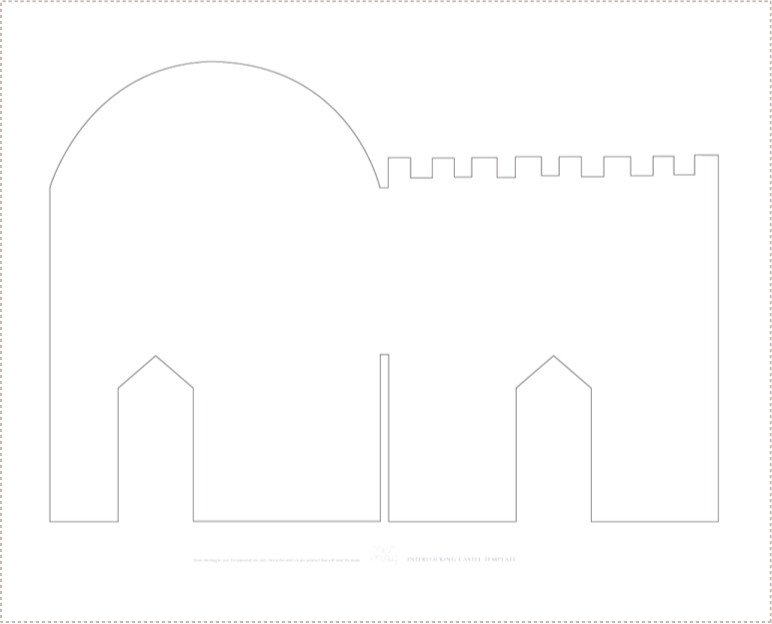
 These templates are created as an 18"x24" document so that you can print them in their entirety. I would suggest saving the files out to a thumb drive and then taking them to your local copy store and have them print them on large sheets of paper there. Click on the pictures above to download each section of the castle. These templates are created as an 18"x24" document so that you can print them in their entirety. I would suggest saving the files out to a thumb drive and then taking them to your local copy store and have them print them on large sheets of paper there. Click on the pictures above to download each section of the castle.
 Now that you are done decorating your castle, it's time to assemble it by lining up the center notches and pushing the top one down (be careful not to un-stick all of your duct tape "siding" in this process. I might suggest scoring the duct tape a bit where the two boards interlock so that this doesn't happen). Now it's time to gather together your little ones toys and figurines and let the play begin! Oh and you can invite the Littles to join you if you so wish. Now that you are done decorating your castle, it's time to assemble it by lining up the center notches and pushing the top one down (be careful not to un-stick all of your duct tape "siding" in this process. I might suggest scoring the duct tape a bit where the two boards interlock so that this doesn't happen). Now it's time to gather together your little ones toys and figurines and let the play begin! Oh and you can invite the Littles to join you if you so wish.
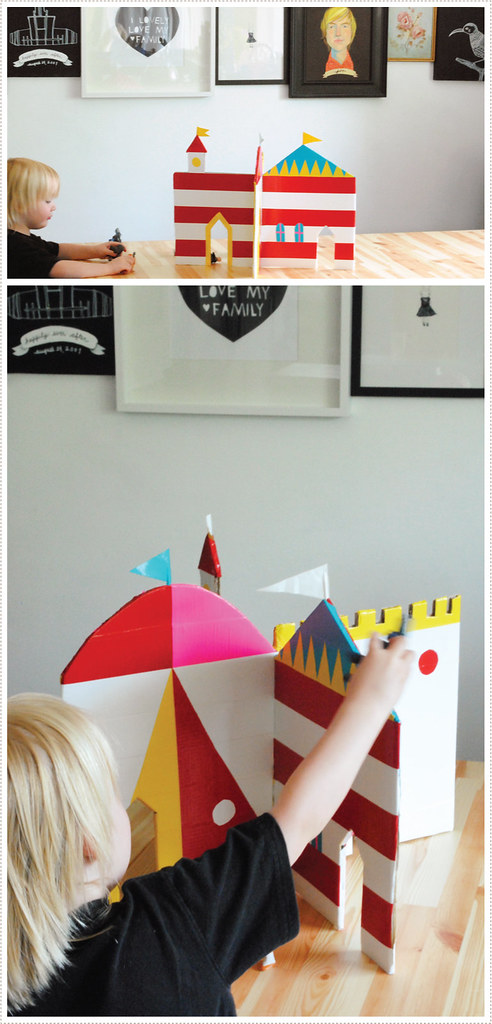
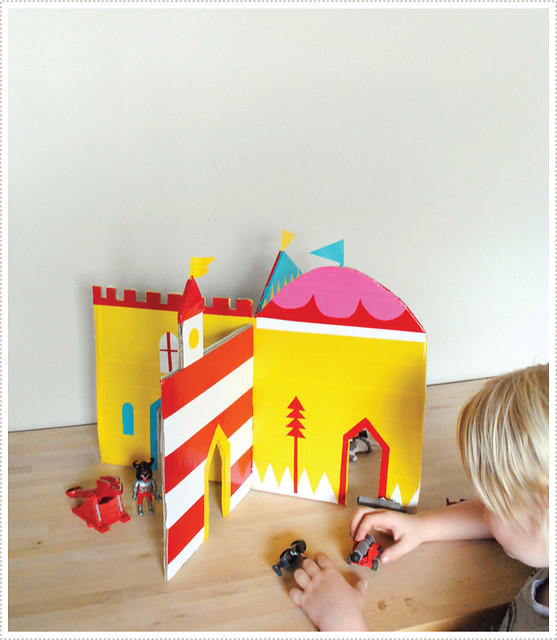 And what fun you will all have exploring all your many rooms! (which can actually change by the way, depending on how you assemble the boards together at different times). And what fun you will all have exploring all your many rooms! (which can actually change by the way, depending on how you assemble the boards together at different times).
 I also love just how portable and rather study this little castle is (that's the great thing about duct tape, it's sort of indestructible). Just bring it over to the kitchen table while your making dinner and your Littles will be entertained for a good long while. I also love just how portable and rather study this little castle is (that's the great thing about duct tape, it's sort of indestructible). Just bring it over to the kitchen table while your making dinner and your Littles will be entertained for a good long while.
 And if you make one of these, I really really would LOVE to see what you do with it. I'm just so excited about the many possibilities for this little castle and I have a feeling that your touch is just what it needs to take it to the next level of magic. So don't forget to email me and share! And if you make one of these, I really really would LOVE to see what you do with it. I'm just so excited about the many possibilities for this little castle and I have a feeling that your touch is just what it needs to take it to the next level of magic. So don't forget to email me and share!
Happy Weekend Friends! I'm off tomorrow to hear A perform his songs he's been practicing for Kindergarten graduation. I'm pretty sure it's bound to be just about the most adorable thing ever. And then next week we have a field day, a Teddy Bear picnic and more. Oh how I love the last few days of school and the beginning of summer!
 OK, so I'm sure you've noticed that I've been on duct tape kick as of late. And if you are just catching up now, you can see a few of my past projects here and here. If you are looking to delve into some duct tape endeavors of your own, I thought I'd share a few helpful hints on how to handle duct tape - specifically how to cut it without wanting to pull your hair out (I had to learn this the hard way). OK, so I'm sure you've noticed that I've been on duct tape kick as of late. And if you are just catching up now, you can see a few of my past projects here and here. If you are looking to delve into some duct tape endeavors of your own, I thought I'd share a few helpful hints on how to handle duct tape - specifically how to cut it without wanting to pull your hair out (I had to learn this the hard way).
First off, do NOT use scissors. I made this mistake when I initially approached my first project. Basically you'll end up going nuts and vow to never do anything with duct tape again. Duct tape is super sticky so when you try to slice it with scissors things just start sticking to each other and once the sticky part of the tape sticks to itself, it's nearly impossible to get it apart. It's also hard to get precision when cutting and your scissors end up all gooey and well, it's just not fun.
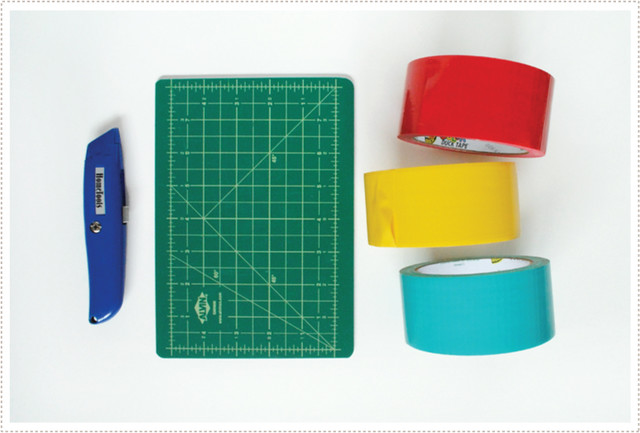
So let's talk about how to do it right, shall we? You will need a utility knife, a self healing cutting mat and of course some duct tape.
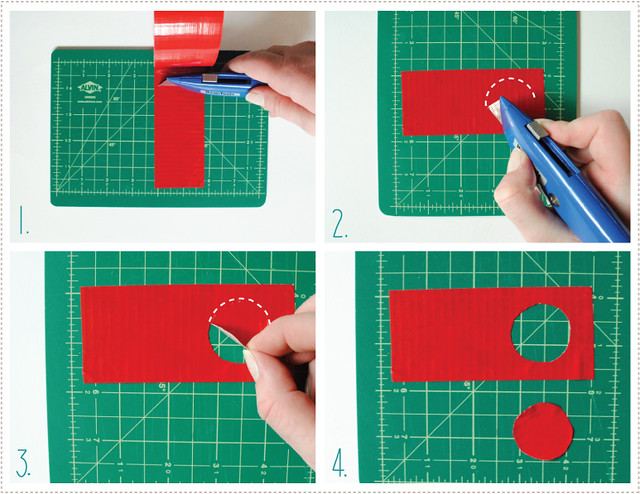 1. Start by rolling out and sticking your duct tape to the self healing mat. Cut a portion of tape off of roll (you can get a really nice straight line this way (and if you want to use a straight edge or ruler, that works even better). 1. Start by rolling out and sticking your duct tape to the self healing mat. Cut a portion of tape off of roll (you can get a really nice straight line this way (and if you want to use a straight edge or ruler, that works even better).
2. Cut desired shape out of tape by pressing utility knife firmly into the tape so that it cuts all the way through.
3. Peel away newly cut shape. I've also found that if if you use the tip your knife to get right under the shape to begin lifting, you avoid the slight turn over your fingernail could create.
4. Enjoy your new shape and place where you want it...
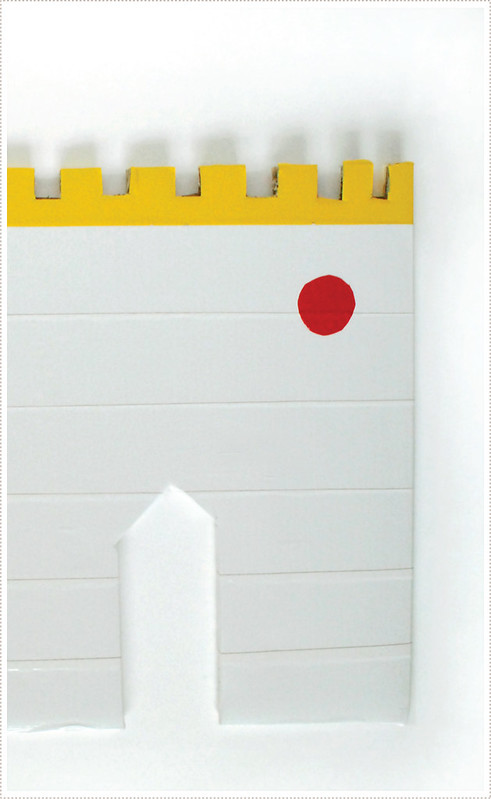
...such as on the upper right hand corner of this of castle that
I'm working on (this is just a sneak peek of one of my most favorite
cardboard/duct tape projects yet...let's just say I got a little
obsessed with it and I can't wait to show it to you! Hopefully
tomorrow?!...)
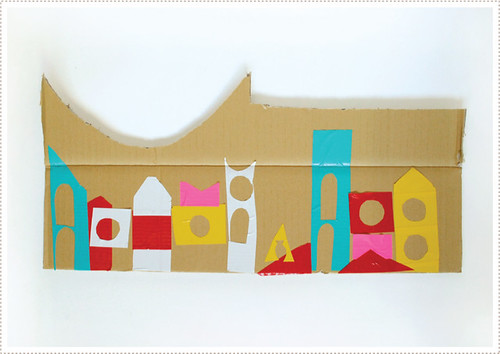
And what's even more fun is that A got an impromptu craft project out of my left over cardboard and duct tape cutting scraps.
 Don't they just make the most perfect skyline? I seriously love how it turned out (and I love that I didn't have to plan a thing for it!). Don't they just make the most perfect skyline? I seriously love how it turned out (and I love that I didn't have to plan a thing for it!).
 Our family spent the weekend working, working, working! We've been rearranging our little home to better suit our current and future needs as a family and the boys were right there with us the entire time (OK, we did have to send them out to the back yard a couple of times and did put in a show for them from time to time when things got super hectic, but for the most part, they were right there in on the action with us). Our family spent the weekend working, working, working! We've been rearranging our little home to better suit our current and future needs as a family and the boys were right there with us the entire time (OK, we did have to send them out to the back yard a couple of times and did put in a show for them from time to time when things got super hectic, but for the most part, they were right there in on the action with us).
We started the day with painting the boys beds, and let me tell you, the boys were really into it. I love the excitement and fervor little ones have when the are included in on "adult" work.
 Wanting to take advantage of their excitement, I decided to put them to work. So we suited them up in paint gear (a.k.a old seasonal pj's) gave them some brushes and rollers and let them go at it. Well, we did have some guidelines for them, so things didn't get too out of control, such as: Wanting to take advantage of their excitement, I decided to put them to work. So we suited them up in paint gear (a.k.a old seasonal pj's) gave them some brushes and rollers and let them go at it. Well, we did have some guidelines for them, so things didn't get too out of control, such as:
1. Stay on the plastic.
2. Only dip your brush/roller into the paint after applying several coats to the beds.
3. When dipping into paint only get a little bit of paint, letting excess paint drip off before applying brush/roller to bed.
Etc.

Throughout this process I also learned that as a parent I needed to follow a few guidelines myself, such as:
1.
Don't overreact when they make mistakes (which is pretty much a
guarantee with Littles), such as when they get globs of paint in spots
on the bed. Simply point out what is going on and help them to smooth it
out.
2. If you need to go back over things, be careful to let them know that they did a great job, and that your painter job is the "follow upper", or something with an even sillier name.
3. Be patient.
4. Put on some fun motivating music to keep all of your spirits up (we tuned it to Pandora's Vampire Weekend station and rocked out).
5. Try to run with their enthusiasm and not to squelch
it when they want to do something above and beyond what you had in mind
for them. Realize that pushing your limits (as well as theirs) is just as much a part of this process.
6.
But even still, remember that it's OK to have boundaries, like when
they want to paint the underside of the bed. Say, "Oh I'm so happy you
LOVE painting so much, but we don't really need to do that and we are
done, so let's put the paint and brushes away now".
7. Teach them
how to clean up (and the importance of it), even though you really just
want to do it yourself as it will be much faster and a whole lot less of a mess.
8. Sigh in relief when it's all through, and then pat yourself on the back for aiding in creating self-actualized human beings and relish in the family work time spent together.
(notice how I had many more guidelines than they did throughout this process?! Remember, teaching kids to work, and to love it, is actually more work for you in the short term, but a huge pay off for both you and them in the long run).
I can recall a number of fond memories working with my family as child. One such memory involved my dad and my older sister and I deep cleaning our entire kitchen one Saturday morning so that we could then go to a water park later on that afternoon. I'm sure I initially wasn't into it but as we all chipped in together and cranked up the Beach Boys we all had a really really fun time. (I still think of this memory when hearing certain Beach Boys songs to this day! I think my sister also introduced me to Tori Amos that morning and I've loved her ever since.) I can remember feeling closer to my dad and sister in this moment than in our typical day to day interactions. Isn't it crazy how work can do this?! I also remember that the first water park we wanted to go to was closed down so our dad drove us all the way to Loveland, Co (another town just outside of where we lived) to catch the very last few moments of that water park before it closed. I can't say as I remember much of that water park experience, but I do remember the fun I had cleaning the kitchen with my dad and sister very well!
OK, so In addition to painting beds, we moved the boys into our larger room and put our things into a much smaller room (which I actually LOVE a whole lot more as it has a much more cozy, clean and simple vibe to it now). I got a quick snapshot of the boys new "in progress" room just as the light was beginning to fade (which explains the dark, graininess of the photo).
 We love it so far (although I really want to change the boys quilts out for a simple grey and white patterned comforter, such as these from West Elm. Don't you just love peach and grey together?! Although Jon fears it will veer too feminine. What do you think?). Well I was sure to point out to the boys what a
difference all of their
hard work made, and they are definitely over the moon about their new beds. We have sort of a manta in our house that goes
something like "sometimes things are hard, but we do them anyway". We
are then sure to point out the pay offs, and stuff like, "it will get
easier the more you do it", etc. I'm big on not letting my kids miss out
on experiences in life just because they were too afraid or because it
was "too hard" (or let's be honest, because it was too hard for me to deal with at the time). Jon jokes that I sort of lean towards a "China Mom" parenting philosophy in this respect. I'm definitely not all China Mom but I strongly agree with the last statement from this article:
"the Chinese believe that the best way to protect their children is by preparing them for the future, letting
them see what they're capable of, and arming them with skills, work habits and
inner confidence that no one can ever take away."
And hey, if I ever get too intense I think my mom's influence of laid back California parenting kicks in and helps to balance things out a bit - or at least I tell myself this to feel a bit better when I lean too far to one side or the other... We love it so far (although I really want to change the boys quilts out for a simple grey and white patterned comforter, such as these from West Elm. Don't you just love peach and grey together?! Although Jon fears it will veer too feminine. What do you think?). Well I was sure to point out to the boys what a
difference all of their
hard work made, and they are definitely over the moon about their new beds. We have sort of a manta in our house that goes
something like "sometimes things are hard, but we do them anyway". We
are then sure to point out the pay offs, and stuff like, "it will get
easier the more you do it", etc. I'm big on not letting my kids miss out
on experiences in life just because they were too afraid or because it
was "too hard" (or let's be honest, because it was too hard for me to deal with at the time). Jon jokes that I sort of lean towards a "China Mom" parenting philosophy in this respect. I'm definitely not all China Mom but I strongly agree with the last statement from this article:
"the Chinese believe that the best way to protect their children is by preparing them for the future, letting
them see what they're capable of, and arming them with skills, work habits and
inner confidence that no one can ever take away."
And hey, if I ever get too intense I think my mom's influence of laid back California parenting kicks in and helps to balance things out a bit - or at least I tell myself this to feel a bit better when I lean too far to one side or the other...
So what about you? Any tips you've come up with to help your kids learn to work and to love it? Do you increase the "at home work load" once school is out or do you just let them lazily dream in fields of green grass? Or both? How do you find the balance? I'd really LOVE to hear what your thoughts are on this!
xo
Mer
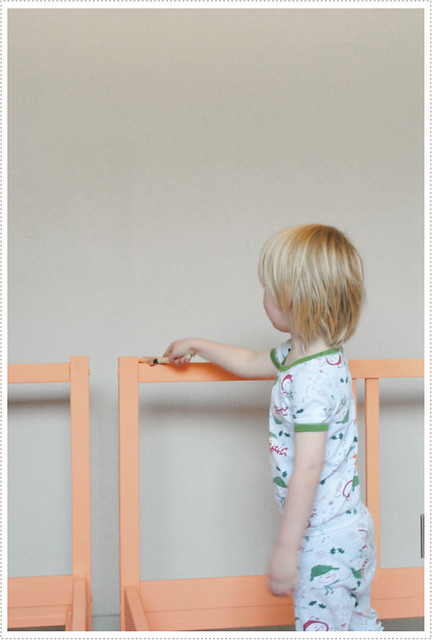
 It's that time of year again. School is almost out for the summer and A is growing out of practically every shirt he owns. We needed to think fast (and thrifty) so off to the store to get $1 shirts (we found ours at the Dollar Tree) and then back to the craft lab to create some one of a kind tees. It's that time of year again. School is almost out for the summer and A is growing out of practically every shirt he owns. We needed to think fast (and thrifty) so off to the store to get $1 shirts (we found ours at the Dollar Tree) and then back to the craft lab to create some one of a kind tees.
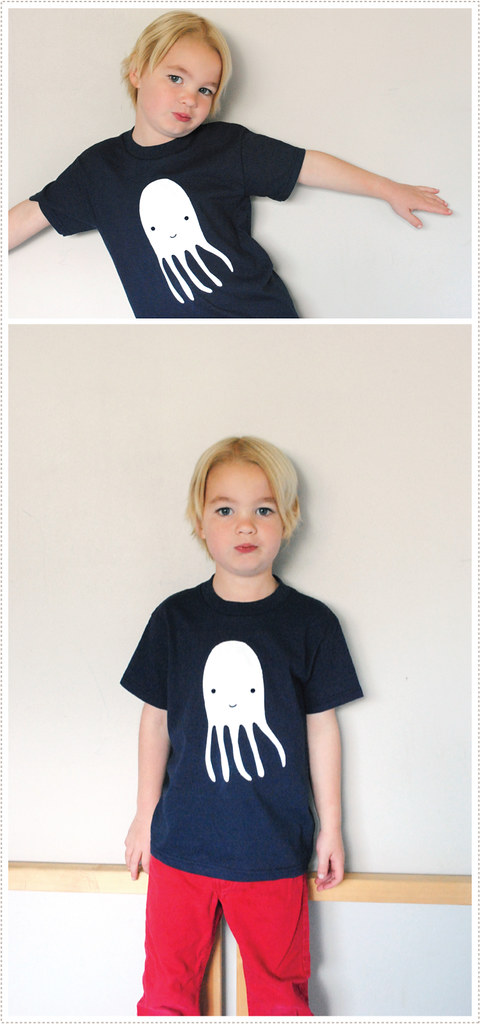
I knew I wanted these to be graphic and simple (design wise at and to make). First we started with a simple little octopus illustration for the navy blue T-shirt. This little guy is hinting at us all kinds of exciting summer water adventures in store for us. I'm really craving the ocean as of late and we're hoping this guy can lead the way.
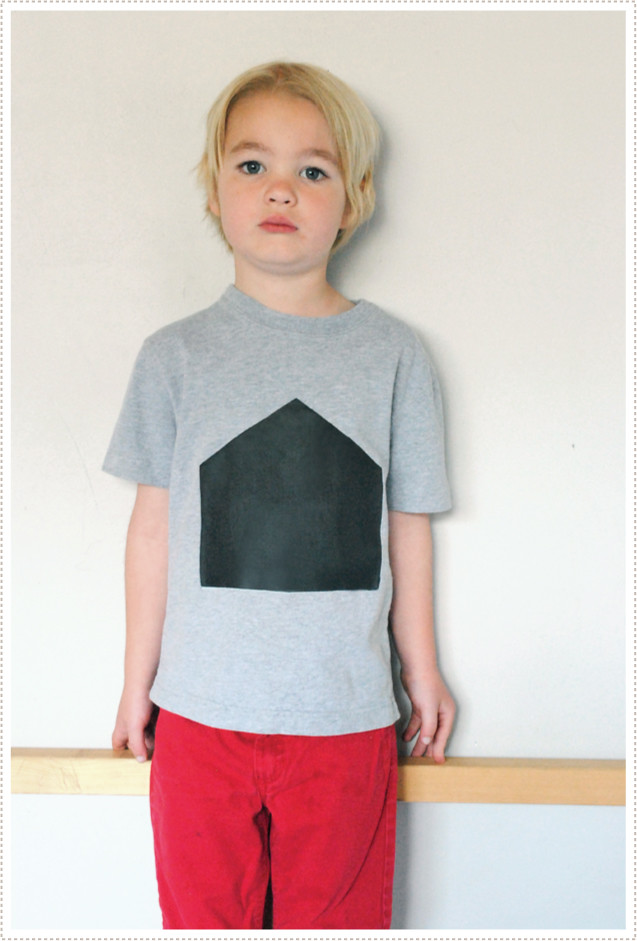 For our second heather grey tee, we simplified things even more and went with a large house graphic of sorts. You could take this in a million different directions if you were making your own (add a chimney, front door, windows, etc.) but we decided to keep things super simple, and we love it. For our second heather grey tee, we simplified things even more and went with a large house graphic of sorts. You could take this in a million different directions if you were making your own (add a chimney, front door, windows, etc.) but we decided to keep things super simple, and we love it.
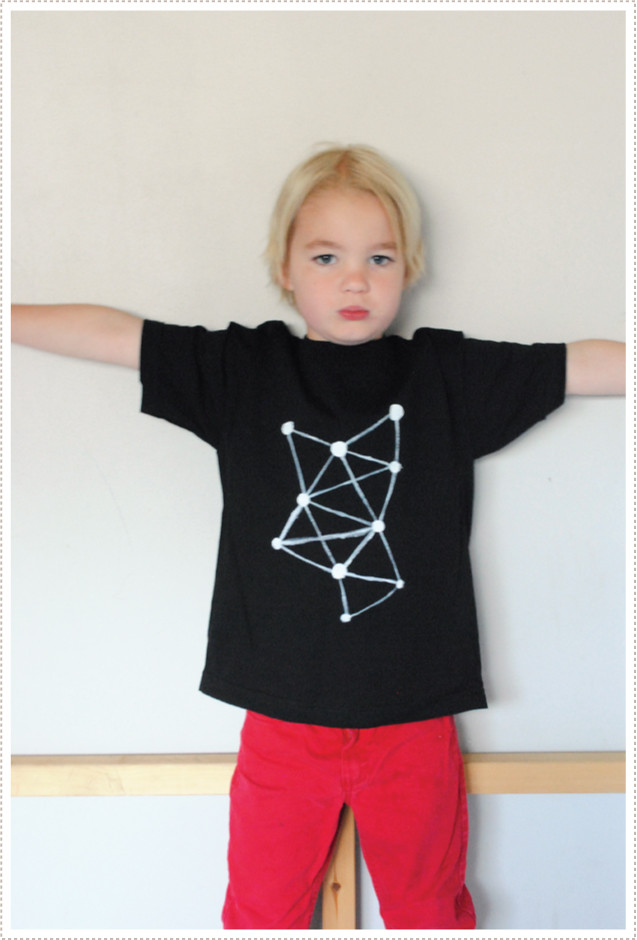 And for our final black T-shirt we went freestyle and created a connect-the-dots geometric design with white fabric paint. (Sorry the photo is blurry but I liked how this pic showed his shirt, and personality, the best). This is a fun one to do with your Littles. You could paint on the large circles and then have them connect them with lines. My boys loved this and pronounced it to be a "kite" when it was complete. And for our final black T-shirt we went freestyle and created a connect-the-dots geometric design with white fabric paint. (Sorry the photo is blurry but I liked how this pic showed his shirt, and personality, the best). This is a fun one to do with your Littles. You could paint on the large circles and then have them connect them with lines. My boys loved this and pronounced it to be a "kite" when it was complete.
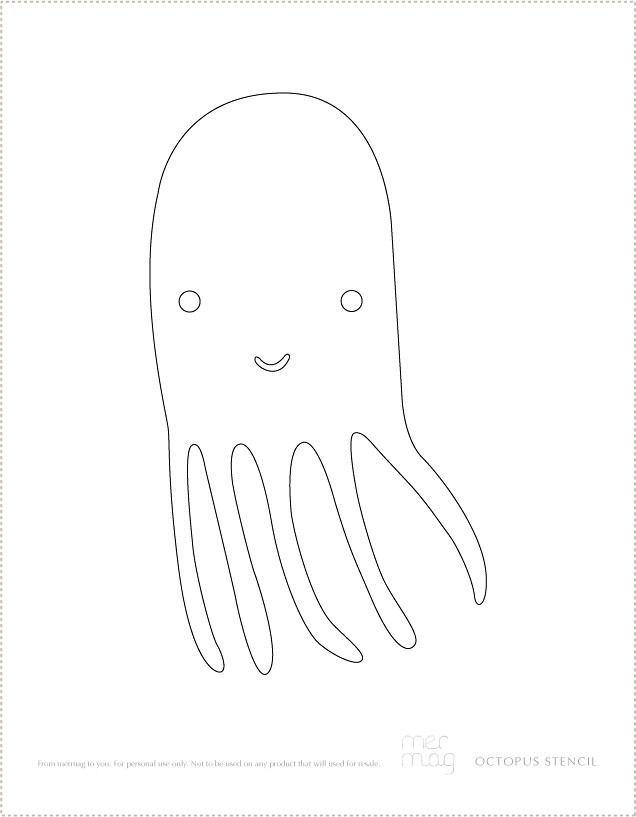 If you are interested in making some of these shirts yourself, I've included our little octopus friend in stencil form to make things easy for you. You can download the pdf of him here: If you are interested in making some of these shirts yourself, I've included our little octopus friend in stencil form to make things easy for you. You can download the pdf of him here:

As for the others, I'm thinking they are pretty straight forward. For the house, you can create your own freezer paper stencil house however you like best. And for our geometric "kite"...well the doors wide open for what you could do on your own with this.
Enjoy and happy last few weeks of school!
Speaking of which, are you are already making big summer travel plans? What about summer classes for the Littles? Do you go with sports? arts and crafts? music? or all of the above? How does one decide? I'd LOVE to hear your tips as I'm trying to figure this out now for my little guys and I'm all in a tizzy!
 I'm trusting you all had a lovely Mother's Day weekend. I was spoiled. Jon and the boys made me sweet fruit crepes for breakfast (SO perfect and yummy!) and then savory ham, mushroom and cheddar cheese crepes for lunch (to die for). The littles showered me with home made cards which are a mother's dream. A made me two of them and said the most lovely things, like "Mom, you are beydoful" (i.e. beautiful). Little O drew me an excellent picture of us saving Mario Universe together. So him, and so perfect. I'm trusting you all had a lovely Mother's Day weekend. I was spoiled. Jon and the boys made me sweet fruit crepes for breakfast (SO perfect and yummy!) and then savory ham, mushroom and cheddar cheese crepes for lunch (to die for). The littles showered me with home made cards which are a mother's dream. A made me two of them and said the most lovely things, like "Mom, you are beydoful" (i.e. beautiful). Little O drew me an excellent picture of us saving Mario Universe together. So him, and so perfect.
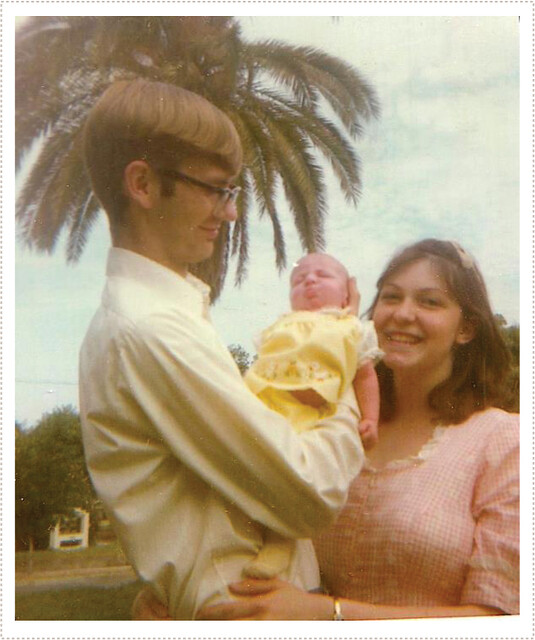
And of course I couldn't forget my own lovely mother (pictured above with her first child, my older sister Daryllyn) on this most perfect weekend. My mom is a legend. She's mothered 9 (and is actually still mothering...2 are still under her wing at home) creative, strong, spirited, and dare I say somewhat challenging (OK, I'm owning up to that one) children and she did it with creativity, humor and fun. My mother is all about fun. And I swear, it's a big thing that has kept my family close. We just LOVE to be together so much because we have SO MUCH FUN and love to LAUGH! My mom's a California girl all the way too. She grew up in South Pasadena (where we recently moved from) and even though she's been in Colorado for many many years, she just can't shake her laid back California ways and she NEVER wears anything but sandals. I think there was a short period in the 80's when she would wear boots in the winter, but that didn't last and to this day she still wears sandal wedges in the winter. After living in gorgeous Cali for three years, I can relate to how hard it is to put socks back on when you've been going without them for long.
My mother is also the queen of creativity and I have to credit her for laying the foundation of a richly creative life for me. In fact, my mother is actually quite the artist. She can whip out a pretty wonderfully stylized caricature of any one of us siblings, and it is dead on. She also is an amazing seamstress and I grew up with her at the sewing machine, like pretty much non stop. She made us ALL of our Halloween costumes, and remember when I said she has 9 children? Well I'm not kidding you when I say that she made all nine of us costumes, year after year (OK we did re-wear costumes from Halloweens in the past at times, but you can bet at least 3 new ones were made every year. In fact we knew we had to put in our order early if we wanted ours to be priority. And even still, she usually whipped them all out one or two nights before the big day).
Well needless to say, I think my mom's pretty great and hope to incorporate all of her wonders into my own parenting. Oh and she's a FUN grandmother! Just last night she told my Little O a bedtime story over the phone so he would go to sleep and both my boys insist on me pushing their "dream button" (the tips of their fingers) every night so that their dreams will start and that they will have good ones (something grandma introduced to them). I love my mom.
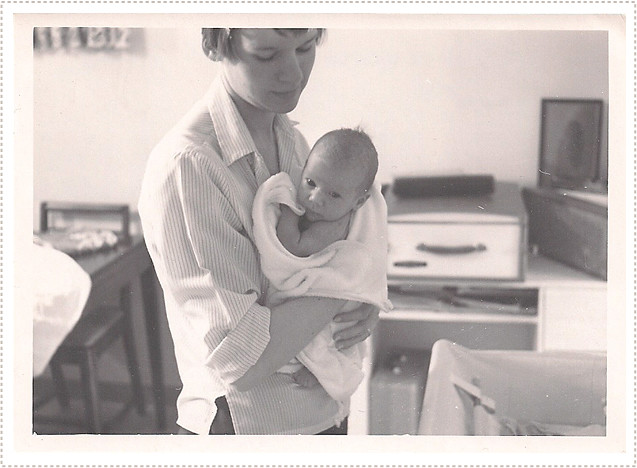 And I can't forget my most lovely Mother-in-law, Jon's mom (pictured above with her first child, Karen). She is a beautiful mother who carries out her life with style and grace. And Oh the things she can cook! If I had just one ounce of culinary talent that she has, I'd consider myself a success in the kitchen. And don't get me started with her gardening skills. Let's just say, she's a wonder. And she has always been so loving and welcoming of me and is a dream of a grandmother. If A had his way, he would be going on walks and hikes with her, pretty much every day. And picking peas with grandma from her garden? Well, I'm pretty sure there are few things more magical than that for my boys. And I can't forget my most lovely Mother-in-law, Jon's mom (pictured above with her first child, Karen). She is a beautiful mother who carries out her life with style and grace. And Oh the things she can cook! If I had just one ounce of culinary talent that she has, I'd consider myself a success in the kitchen. And don't get me started with her gardening skills. Let's just say, she's a wonder. And she has always been so loving and welcoming of me and is a dream of a grandmother. If A had his way, he would be going on walks and hikes with her, pretty much every day. And picking peas with grandma from her garden? Well, I'm pretty sure there are few things more magical than that for my boys.
So yeah, I'm super thankful for mom's and the wonderful examples of them that I have in my life. I consider myself blessed to be a mom, and although far from a perfect one...I'm grateful for the chance to go on this crazy (and sometimes magical) ride called life, as a mom to my wonderful littles...all three of them...er um...did I just spill the beans there?...
 Mom's are the best, right? And although we should be celebrating them on a daily basis, I'm so glad we have a specific day set aside to show the mother's in our lives just how much we really appreciate all that they do for us. Well, Mother's Day is just 3 days away which leaves just enough time for last minute gift ideas. In fact, this idea was so last minute last year (yes, I said last year) that I didn't have time to blog about it in time for Mother's Day 2011. But for 2012, I've got you covered (I'm just really on the ball for this year, right? Which is a good thing because I've been swamped drawing so many little darlings due to the large amount of Mother's Day portrait orders from the Daily Candy Kids coverage...Way to think ahead, that's what I say). Mom's are the best, right? And although we should be celebrating them on a daily basis, I'm so glad we have a specific day set aside to show the mother's in our lives just how much we really appreciate all that they do for us. Well, Mother's Day is just 3 days away which leaves just enough time for last minute gift ideas. In fact, this idea was so last minute last year (yes, I said last year) that I didn't have time to blog about it in time for Mother's Day 2011. But for 2012, I've got you covered (I'm just really on the ball for this year, right? Which is a good thing because I've been swamped drawing so many little darlings due to the large amount of Mother's Day portrait orders from the Daily Candy Kids coverage...Way to think ahead, that's what I say).
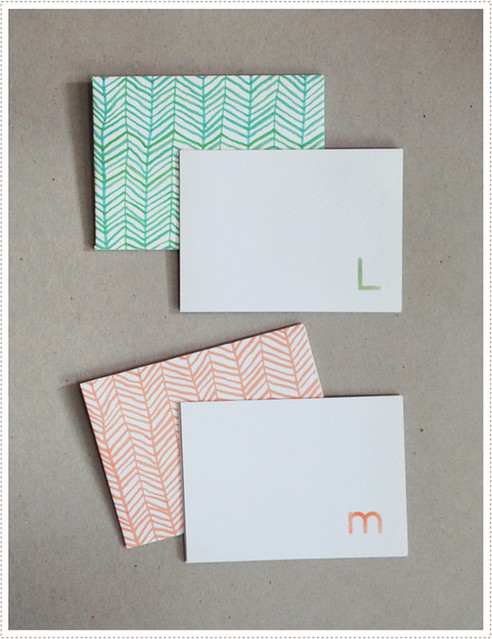
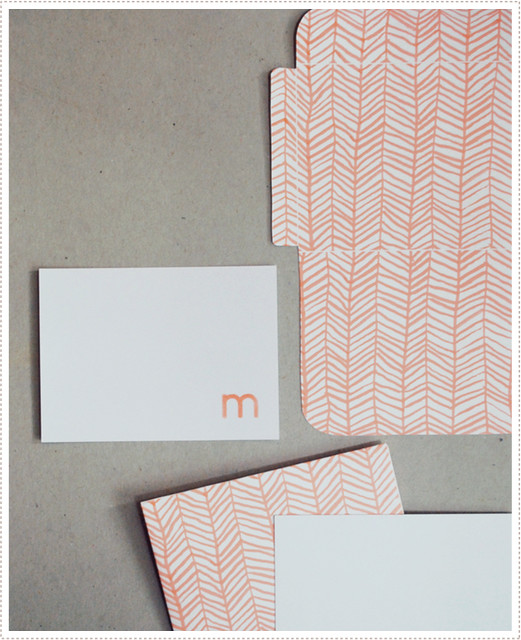
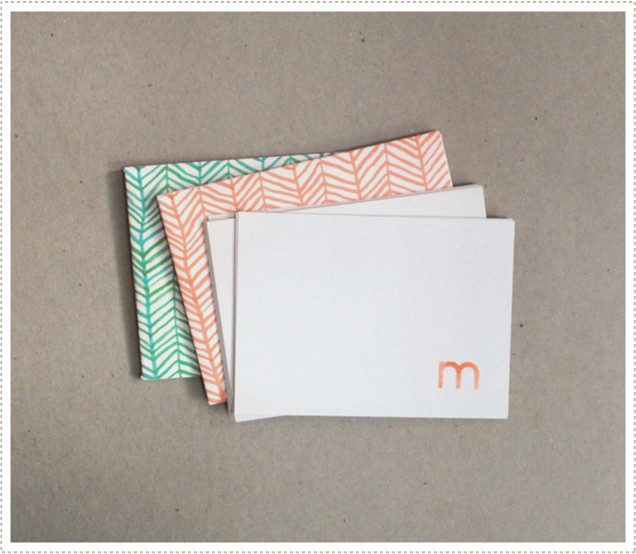 With my free downloadable herringbone patterned envelopes and some custom
stamped monogram cards (easily made by you with a stamp or sponge using letter stencils - perhaps with some help from the kiddos?), you have the
perfect gift to let the mother's in your life know how much you love them. With my free downloadable herringbone patterned envelopes and some custom
stamped monogram cards (easily made by you with a stamp or sponge using letter stencils - perhaps with some help from the kiddos?), you have the
perfect gift to let the mother's in your life know how much you love them.
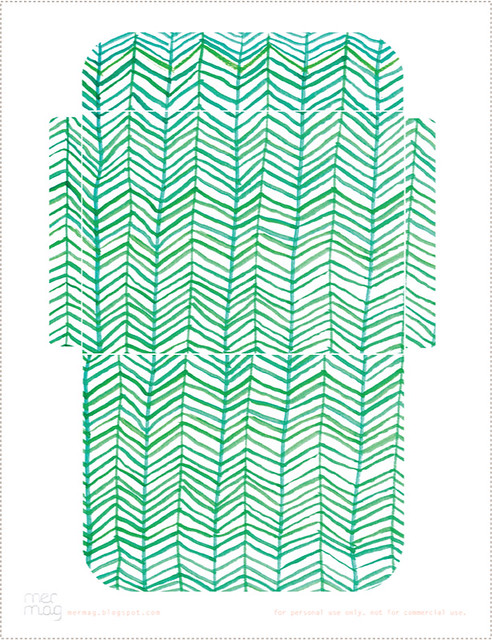
 To download the hand painted green herringbone envelope, just click here. To download the hand painted green herringbone envelope, just click here.
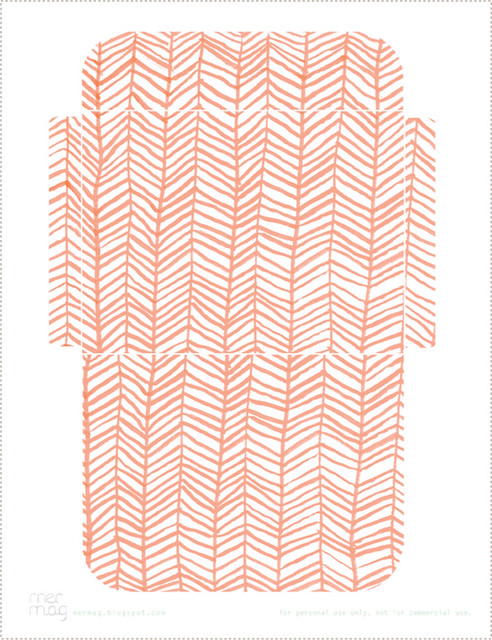
 And to download the hand painted peach herringbone envelope, just click here. And to download the hand painted peach herringbone envelope, just click here.
Wishing you all the most wonderful Mother's Day weekend! And happy Mother's Day to all you beautiful mothers out there!
xo
Mer
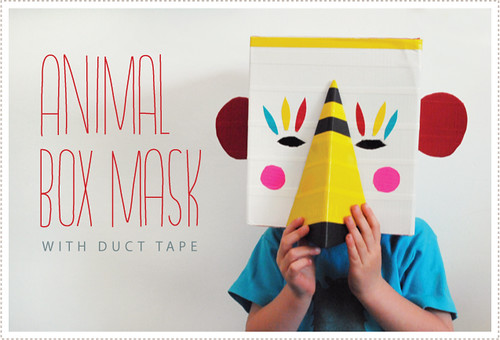 Our spring cleaning was delayed for some reason or another and it just so happens we are knee deep in it now, organizing closets, purging this and that and finally decorating some much neglected spots around the house. We've been in our place for about 10 months (I can't believe it!) and I still feel like we are new here. And to prove it we still, (yes, I'm embarrassed to admit it) still have boxes that need unpacking/sorting through, etc. And with unpacking/sorting, etc. comes a cluster of extraneous boxes. And well, with the current box/duct tape fervor going on around here, we knew just what to do with some of the smaller sized ones. Re-purpose them and make colorful animal masks of course. Our spring cleaning was delayed for some reason or another and it just so happens we are knee deep in it now, organizing closets, purging this and that and finally decorating some much neglected spots around the house. We've been in our place for about 10 months (I can't believe it!) and I still feel like we are new here. And to prove it we still, (yes, I'm embarrassed to admit it) still have boxes that need unpacking/sorting through, etc. And with unpacking/sorting, etc. comes a cluster of extraneous boxes. And well, with the current box/duct tape fervor going on around here, we knew just what to do with some of the smaller sized ones. Re-purpose them and make colorful animal masks of course.
 To do this you'll need to start with a box the is just larger than yours or your child's head. (If you don't already have one to size, you can easily duct tape together 5 pieces of cardboard and make a box yourself). Once you have your box you can then go crazy with fun and colorful duct tape, electrical tape, paper, markers, paint, you name it! (I only used tape for my masks but you can use a number of craft materials to make yours. have fun with it!). Once the mask was decorated I used a utility knife to cut out the eye holes. To do this you'll need to start with a box the is just larger than yours or your child's head. (If you don't already have one to size, you can easily duct tape together 5 pieces of cardboard and make a box yourself). Once you have your box you can then go crazy with fun and colorful duct tape, electrical tape, paper, markers, paint, you name it! (I only used tape for my masks but you can use a number of craft materials to make yours. have fun with it!). Once the mask was decorated I used a utility knife to cut out the eye holes.
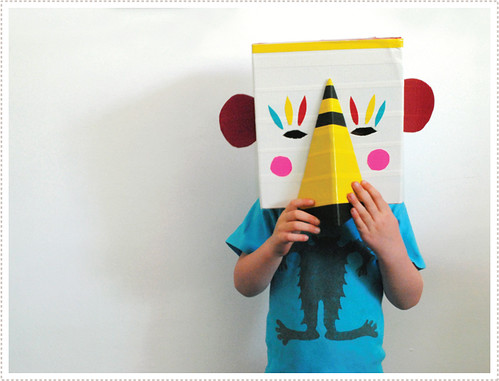
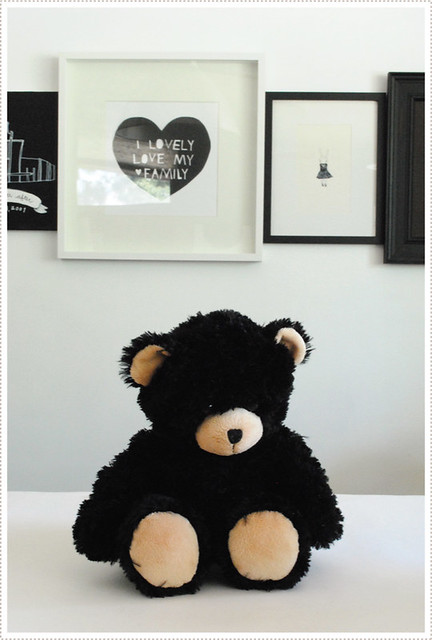
I did this craft with Little O (3.5yrs) when A (6 yrs) was at school and let me tell you, this was the perfect thing for him. He LOVES to dress up and is obsessed with characters and taking on their different personas. He's more our imaginative play enthusiast while A is more our linear thinker (loves puzzles, putting things in order, math, etc. - Although A was the only one who had imaginary friends...I haven't heard from any of them lately, wonder where they went to?...). A also has never really been into masks as he's not one for a lot of sensory items around his face and neck. Sometimes I worry that my crafts for the boys cater more towards A's personality so I was very happy to have this time with Little O where we could indulge in some one-on-one time, creating and playing in HIS world. And...if we are in in his world, then we must bring along a number of his friends, such as Mr. Bear here (who is actually A's but Little O has pretty much taken over the entire stuffed animal collection and A's more or less perfectly OK with it).
 And in Little O's world, Mr. Bear needed to be outfitted with a mask as well. And I agreed that it only seemed fair. So we cut up a Go-Gurt box and made a fun warrior bunny mask of sorts just the right size for Mr Bear. And together the two of them had a grand time sneaking around, dancing, jumping and performing in their new incognito forms. And in Little O's world, Mr. Bear needed to be outfitted with a mask as well. And I agreed that it only seemed fair. So we cut up a Go-Gurt box and made a fun warrior bunny mask of sorts just the right size for Mr Bear. And together the two of them had a grand time sneaking around, dancing, jumping and performing in their new incognito forms.
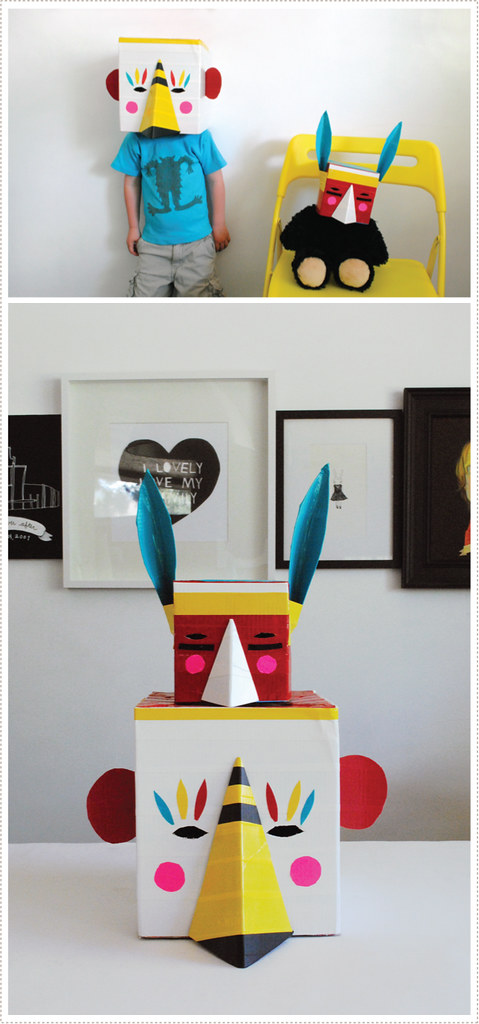 When A came home he enjoyed the masks as well (although was not too keen on wearing one) and the boys couldn't get enough of trying them on their various stuffed animals and softies. You'd think it was the most hilarious thing in the world, to hear their giggles. When A came home he enjoyed the masks as well (although was not too keen on wearing one) and the boys couldn't get enough of trying them on their various stuffed animals and softies. You'd think it was the most hilarious thing in the world, to hear their giggles.
 And I have to admit, I've really been enjoying the bright pop of color these recent crafts have brought to our otherwise black+white+neutral home decor color scheme. Makes me think that summer really is just around the corner. And I have to admit, I've really been enjoying the bright pop of color these recent crafts have brought to our otherwise black+white+neutral home decor color scheme. Makes me think that summer really is just around the corner.
And I hope you're not too too tired of our cardboard and duct tape creations, because I can't quite shake the bug. I fear there might be at least one more craft we'll have to share with you that involves a combination of re-purposed house hold items and fun bright pops of duct tape!
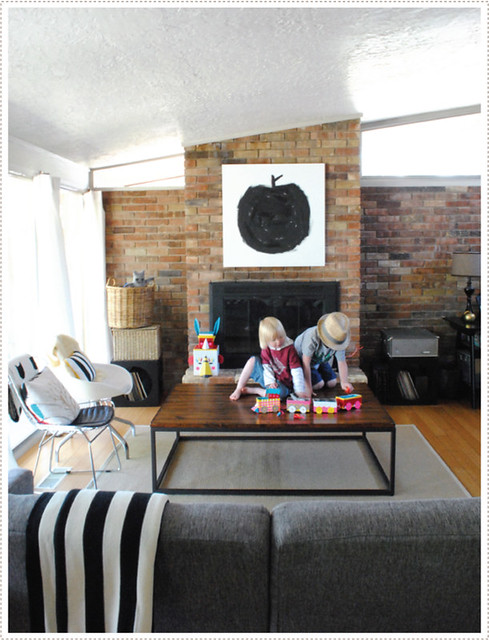
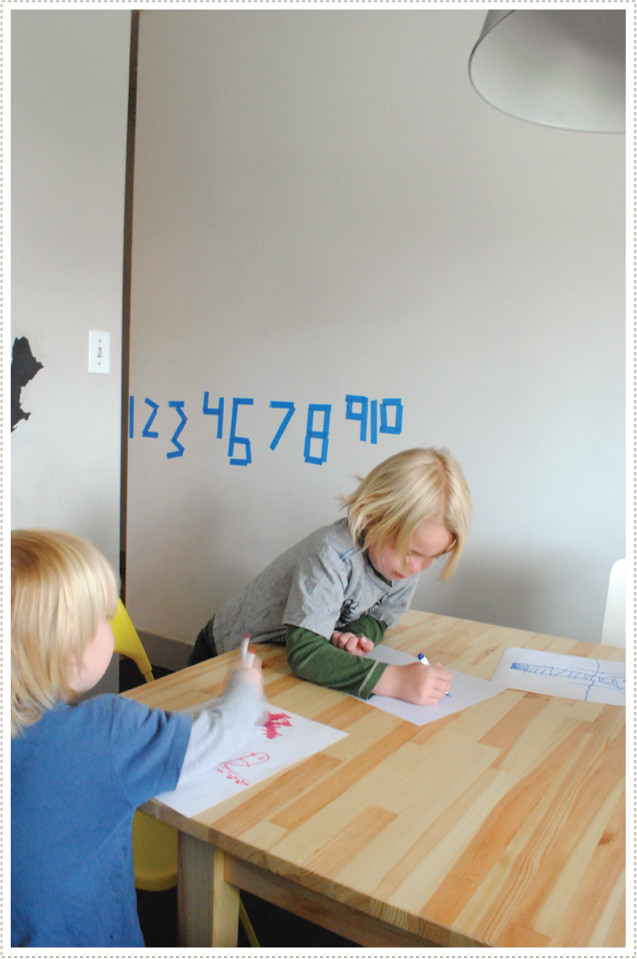
 I love how random every day household items, such as painter's tape, can become the perfect teaching/learning/artistic tool for kids. After I put up A's "Happy 6th" sign with painter's tape, he was hooked. He started spelling out his own words and taping up numbers right and left. I love how random every day household items, such as painter's tape, can become the perfect teaching/learning/artistic tool for kids. After I put up A's "Happy 6th" sign with painter's tape, he was hooked. He started spelling out his own words and taping up numbers right and left.
A has of course been able to count for some time (he's in the 100's now) but he got so much fulfillment out of creating these numbers and words in tape form. And I love how in turn this helps Little O learn about counting and the joy of learning. (Oh and A told me he purposefully forgot the "5". I think that's
code for "I turned the 5 into a 6 on accident and I don't want to take it all down and do it again just so that I
can fit in the 5 that I forgot" :) ).
 I now want to purchase a set of colorful masking tape and let them have at the walls. Brings a much more temporary approach to "coloring on the walls". I now want to purchase a set of colorful masking tape and let them have at the walls. Brings a much more temporary approach to "coloring on the walls".
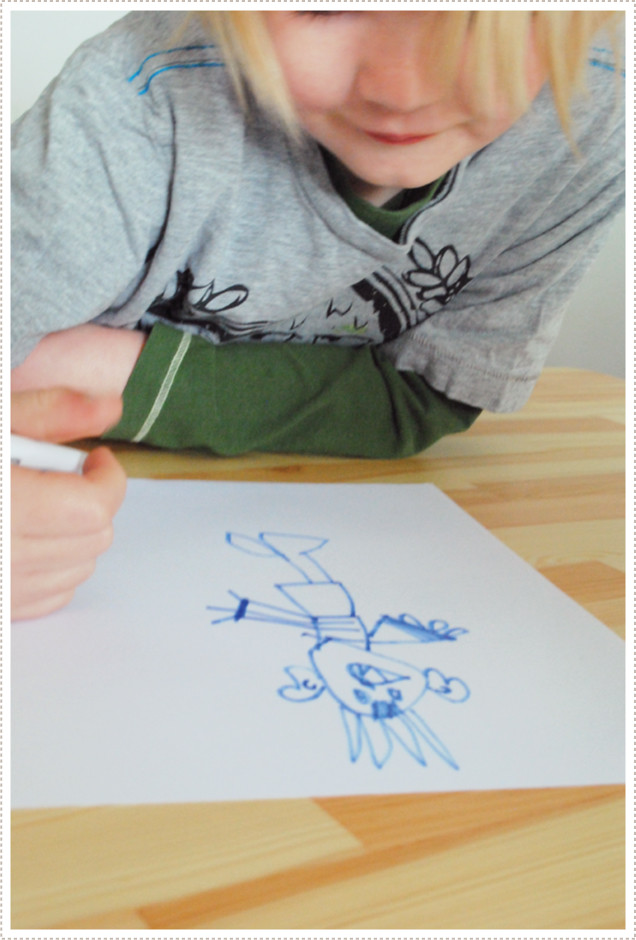
And what's better than a little freestyle monster drawing after some constructive math time? According to the boys, not much I tell you. Not much.
|